One Room Challenge: Week 8: The Reveal
Hey friends hey!! I can’t believe that this is week 8, and I can finally reveal this space to you. The anticipation has been building for the past couple of weeks, so I am definitely glad we have made it to this point. The room is completely finished except for one shelf that I wasn’t able to put on due to the brackets being on back order. Anyway, that did not take away from the overall space, so here we are. The space is finally done.
Before we jump into the amazing after, I want to take a moment to thank a few people. First, thank you to Linda, the creator and organizer of the One Room Challenge. Thank you for allowing guests participates into this space and thank you for creating this platform. Next, thank you to my boo, Carmeon, for her expertise. I will share more on that later. Also, I would like to thank all of you for your positive comments and words of encouragement. I know you are just as excited to see the reveal as I am to share it with you. Finally, thank you to my wonderful husband for allowing me to disrupt our lives with this makeover. You are always so supportive and your willingness to be my handy man is appreciated.
Enough of that, let’s dive into what has made the space a dream come true. First, let’s get another glimpse of how it looked before. I generally liked the overall floorplan of my Master Bathroom so I definitely didn’t see the need to do any renovations. However, the aestethics of the place just left so much to the imagination. This makeover was so needed and it has completely transformed our master bedroom/bathroom situation. My dream was able to come true in only 8 weeks time. I am so glad that I chose to take on this challenge and to just go for it.


So as you can see this space was overdue for a makeover, and the One Room Challenge and quarantine was the perfect excuse to tackle this space.

I love mixing prints which I do often in my home space with accessories, so my bathroom makeover wasn’t going to be any different. I have always loved the entry way at my friend, Carmeon Hamilton, of Nubi Interiors home. Since I knew what wall paper I was going to choose, I decided that I had to have this mural painted in my water closet. I definitely wasn’t going to attempt to do it myself, so I called up Carmeon and asked her would she do the honors. Without hesitation she said yes. We set a date, and now I’m living the dream.
While Carmeon was completing the mural, I shared my decide plan with her. She suggested that I paint the ceilings black. If you know Carmeon, then you know the suggestion is going to be pure gold. I immediately called my painter to schedule for him to come back out to now do my ceilings with left over paint we already owned.

I knew early on that I wanted white in this room, and Sherwin Williams Pure White is what I got. The 5th wall was painted in Sherwin Williams Tricorn Black. It adds so much character to the space. I love the contrast between the white walls and door with the black ceiling. The brass CB2 flush mount light fixture is the icing on the ceiling. Don’t you think?

Painting these tile floors were game changers in this space. There was no way I could have a beautiful space and still have brown tile floors. It just didn’t match the look I was aiming for. I originally hired this out, but ended up doing them myself when the painter didn’t show up. I used Behr Marquee in Black.
In another post, I will break down each step in the process of painting this tile floor.

All of my wallpaper was provided by the wonderful people at Milton & King!!. The representative was extremely helpful and even checked my calculations for me. He had his team package and ship me out exactly what I needed. I knew from the moment that I was going to sign up for ORC, I knew that I had to have this Leopard Wallpaper. I first saw it when my friend, Shavonda Gardner, of SGStyle used it in her master bathroom makeover for ORC a couple of years ago. I loved the print then, and love it even more in this color scheme. This was the boldness that I desired for this space.
I had the hardest time finding a person who hung wallpaper, and after several failed attempts, I reached out to Lindsey of Murphy Maude Interiors. She gave me the number of a wallpaper expert. Now I am in love with his work, and I will use him for all of my other projects.
Now, let’s move on to the real reason you are really here! The moment you all have been waiting for! It’s reveal time!
Master Bathroom
The Milton & King wallpaper was going to be the biggest impact in this space. Therefore, everything else was designed around it. From the gold, green, and black accents in the accessories to the black ceiling and floor color. It truly was the springboard to the entire room. Even spilling over into my mini-refresh of my Master Bathroom. That will come in a later post.
Let’s talk about this 6-light show stopper chandelier from CB2. It literally stops you in your tracks when you walk in to the bathroom. When I saw it, there was no question that this was the one. When you know, you just know. The way it compliments the wallpaper in making a bold statement is what I was going for.

The Vanities
I wanted the space to feel a certain way, and nothing gives you the feels like the color black. I had the cabinets on these two vanities painted in Sherwin Williams black.


Water Closet
Carmeon did an amazing job on this mural. It literally makes me smile when I’m in here. I can now say I have a mural in my own home to love for years to come. The shelf, light fixture, and the toilet paper hold are all from CB2. Of course, I had to have another piece of artwork from Monica of Monica Lewis Art in this space as well.

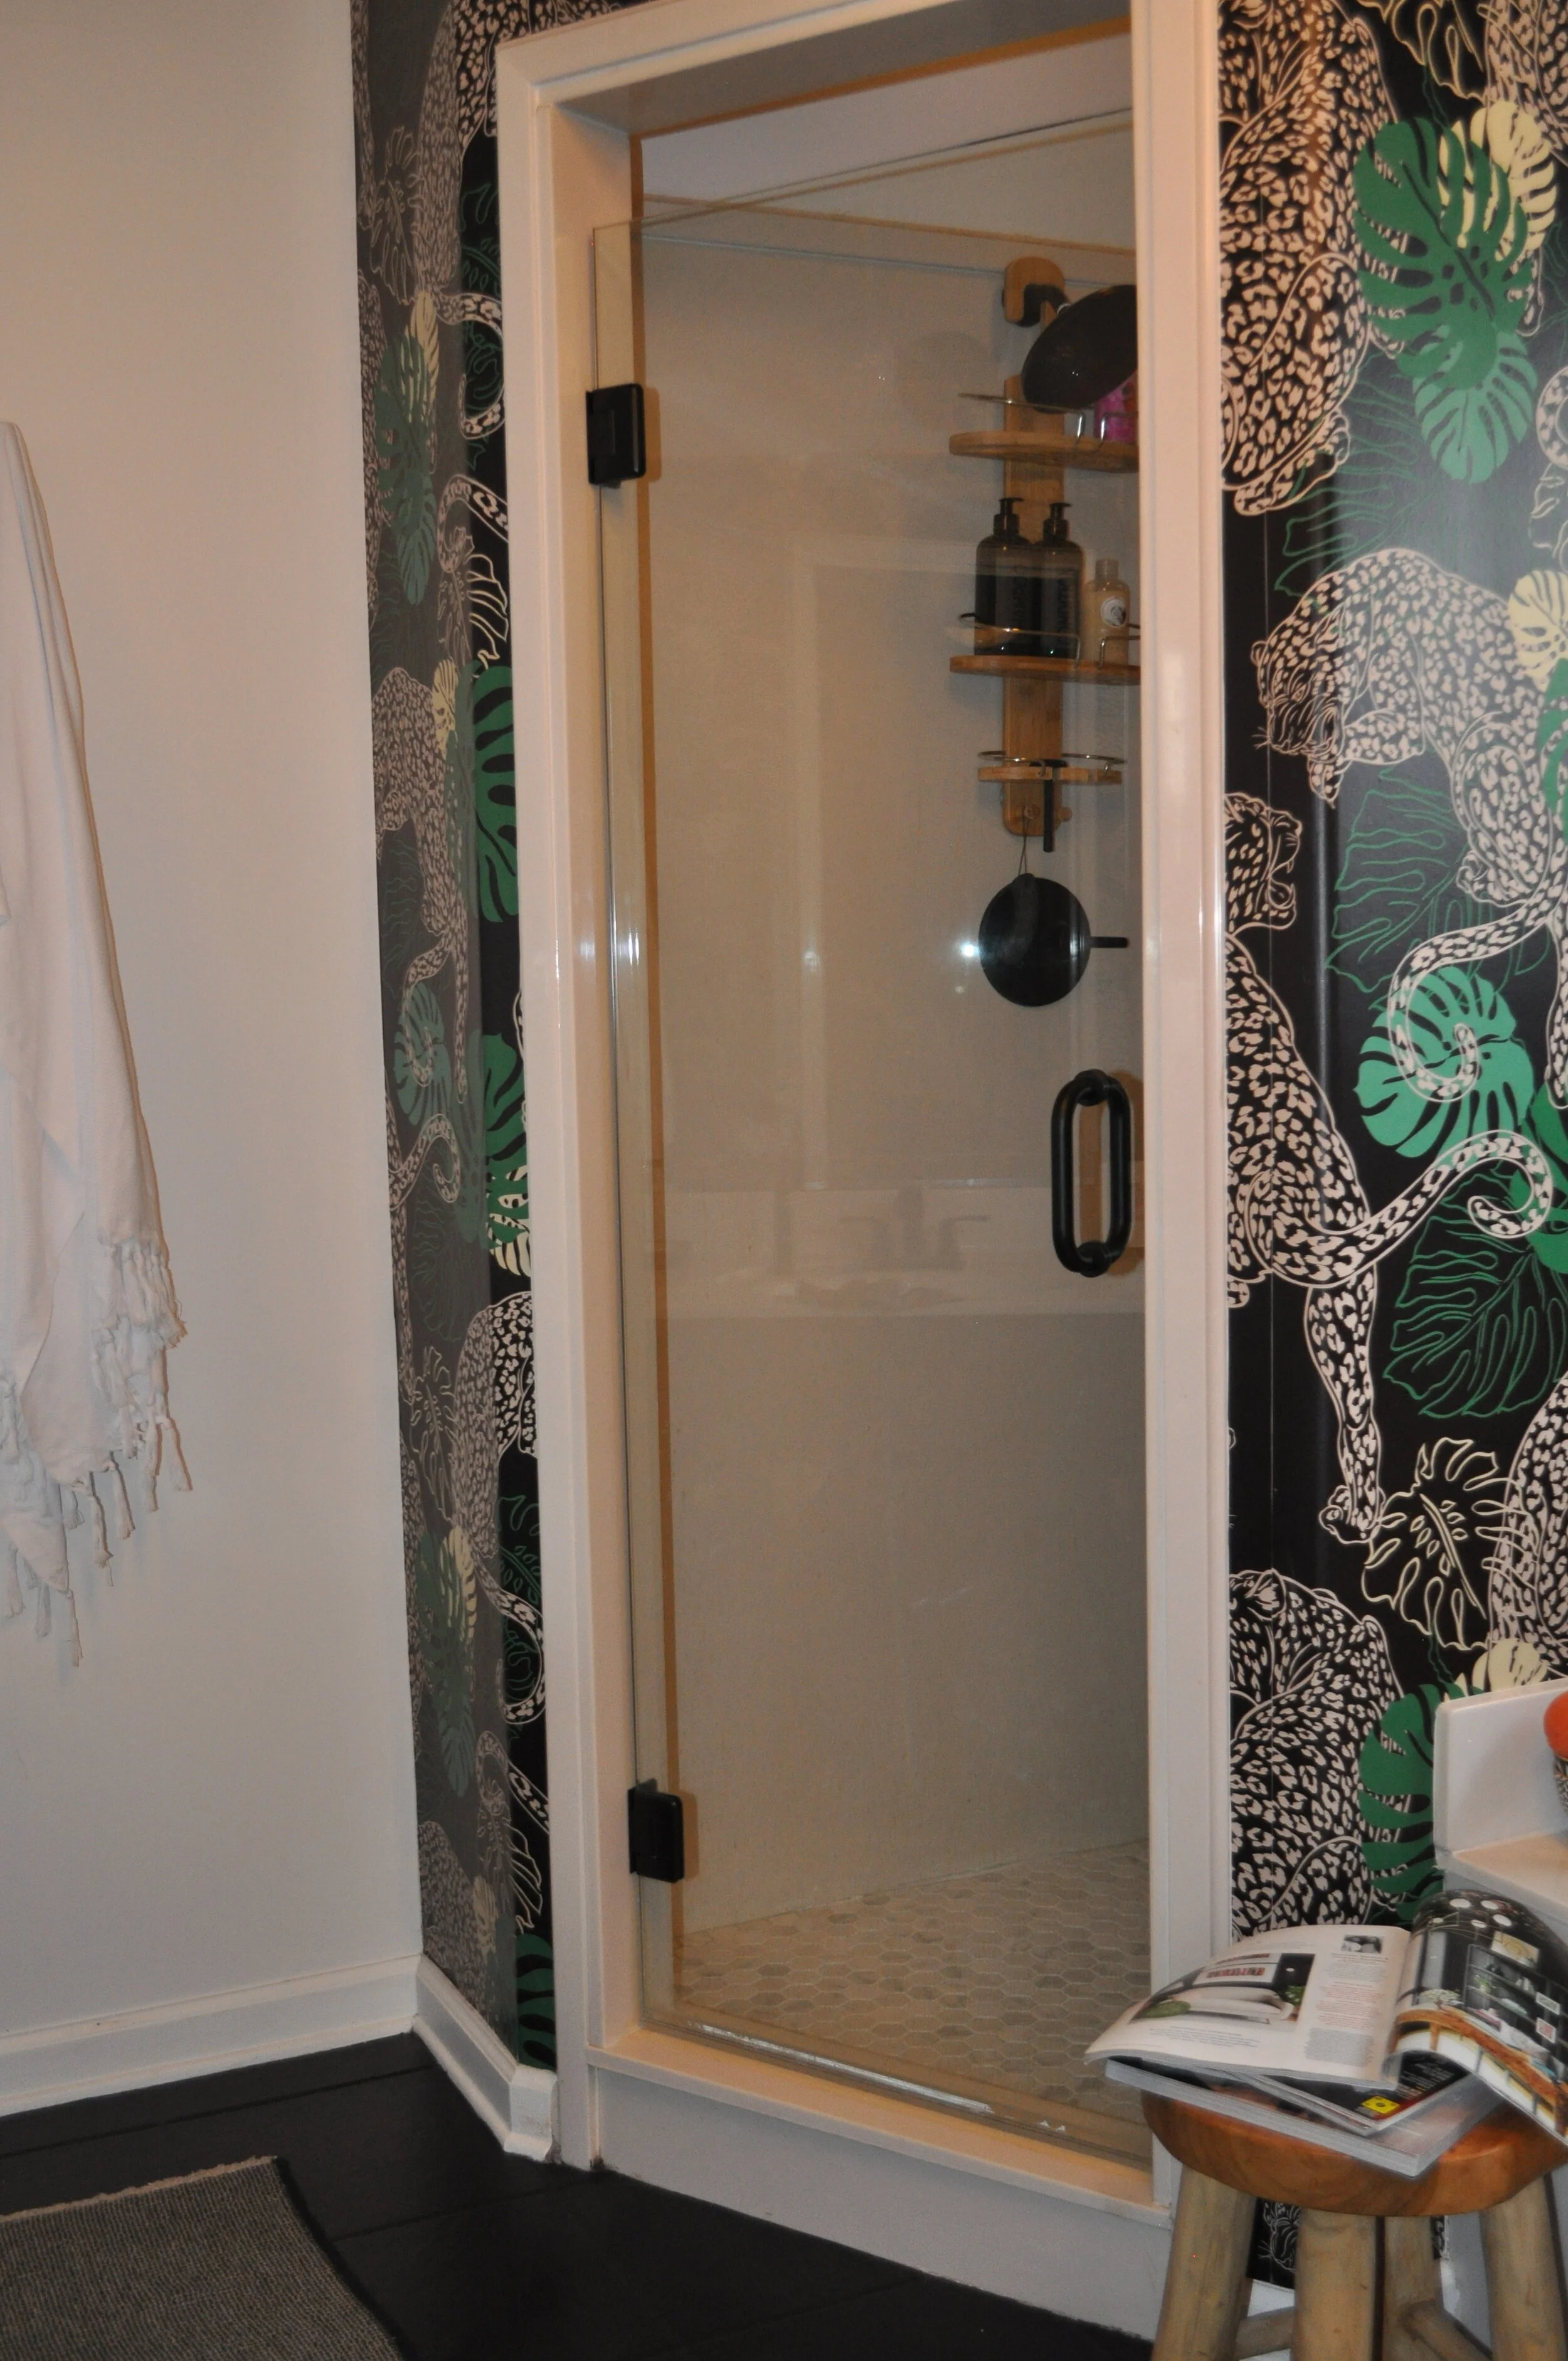
Originally, there was a framed shower door here,but I desperately wanted to change it out. There room just wouldn’t be complete if it wasn’t upgraded. One evening, the hubs and I were over to Carmeon’s house and I asked to see her shower door by Campbell’s Glass. I knew instantly that I had to have them do my shower door. I then called my husband from the other room to see the gift he could buy me for my birthday. Drew at Cambpell’s Glass was very professional when he came out to take measurements and for me to pick out the hardware. Of course, the hardware is matte black and is curved. I wanted to break up some of the squareness to the space. So now, I have a beautiful glass door that I still pinch myself that this really became a reality.
Hardware and Light Switches

The hubs upgraded all of our outlets and light switches to the Adorne Collection by Legrand. These instantly make the room feel like it is truly in the 21st century. It has definitely taken the space up 10 notches. The artwork is from Monica Lewis of Monica Lewis Art. As you enter the bathroom door, you will see this image. It is the entryway that leads you into the entire bathroom’s color story.

During the last hour, I decided to change out all of the door knobs and hinges for this black modern hardware. These are the Schlage Bowery Privacy Knobs in Matte Black from Amazon. This tassel is from Tierradellagarto. I just love the texture and look of this door tassel.
The vanity was upgraded with these brushed brass square door pulls and knobs by CB2. Changing out these knobs really dressed up these newly painted vanity cabinets.

Finishing Touches
The small details in the space pulls the space together. I was very careful with my selections of each accessory item that I put into this space. I wanted to stick with black, natural tones, creams, golds, and greens so that nothing could compete with my wallpaper.
I love Turkish towels, so I set out to purchase one in black and white and two in white. These towels were purchased through Etsy. The stool was purchased at Home Goods, and the black and white gold plated bowls are from Holistic Habitat.


There was no way that I was making over a space in my home and not have it include artwork by black artist. There was just no way I was going to allow that to happen. This portrait titled & Still You Bloom by Cristina Martinez of June&Mars is just beautiful in so many ways. I just had to have this piece and it was a must that it was placed where I can see it daily as a constant reminder to BLOOM. Then, I purchased this original abstract from Monica Lewis of Monica Lewis Art. I used this piece from Monica as a layering piece, and it is just so stunning.
I originally wanted a fresh flower arrangement for this space, but decided on a dry flower arrangement from the talented floral designer Kristin of Everbloom Designs. She never sense to amaze me with her attention to detail. I am thrilled that I get to have this piece forever.

Someone on social media posted a piece of artwork by Projectgetfree, and I immediately ran to their page to peruse their artwork. Once I saw Queen and Peace King, I placed these original pieces in my cart and whipped out my debit card. These two pieces that are placed opposite each other on his and her sides are just what this walkway to the bathroom had been missing. I am forever a fan of this this talented artist.

What would be a space that has large Monstera leaves on the wallpaper without having a real Monstera Swiss Cheese plant in this makeover? Right, It doesn’t make sense if this plant didn’t make an appearance.
So there you have it friends. We made it to the finish line, and I am so happy about it. This makeover was well worth every penny spent on it. Now, I get to wake up each day and smile at what this space has become in 8 short weeks.


Thank you again to Milton and King and Monica for gifting me the most beautiful pieces for this space. Thanks again to Linda for creating this platform. Thank you to Better Homes and Gardens for being a media partner. As I take a much needed nap, I want to thank you again for your support and encouragement during this process.
To my girl and photographer, Kim Thomas of KPFusion for shooting this space and do whatever it took to get the perfect shot. You are the real MVP.
Please go and check out all of the other featured and guest designers.

Thank you all for following along and please stay tuned for more.